To be able to create a new VxWorks kernel image from a Curtiss-Wright BSP you need an updated VxWorks Source Build (VSB) project, i.e., the project must be based on a BSP that includes Dolphin eXpressWare drivers. Please refer to the WindRiver documentation for instructions on how to create a VSB project based on a BSP.
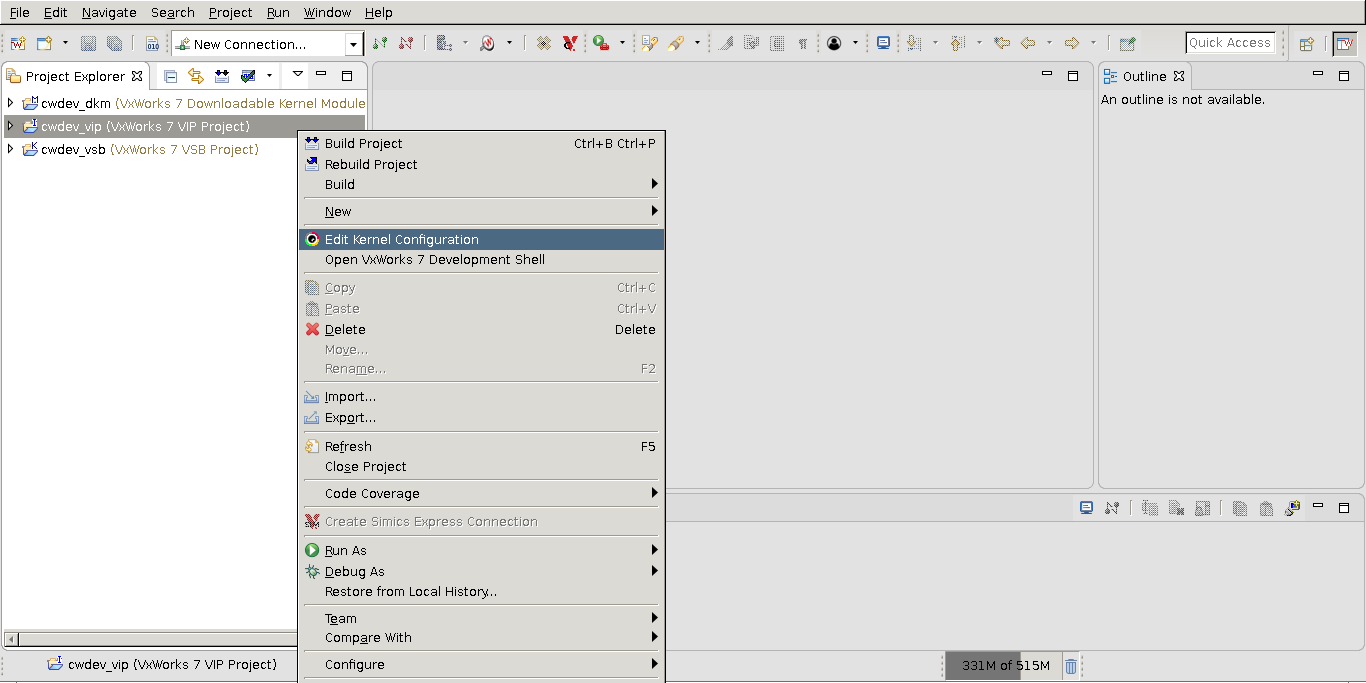
Based on this updated VSB project, a VxWorks Image Project (VIP) must be created. As seen in Figure 4.1, “VxWorks Workbench: Edit Kernel Configurations”, the first step to adding eXpressWare PCIe drivers is to edit the "Kernel Configuration". This is achieved in Workbench by right-clicking on your VIP project (in Project Explorer) and then choosing "Edit Kernel Configuration".
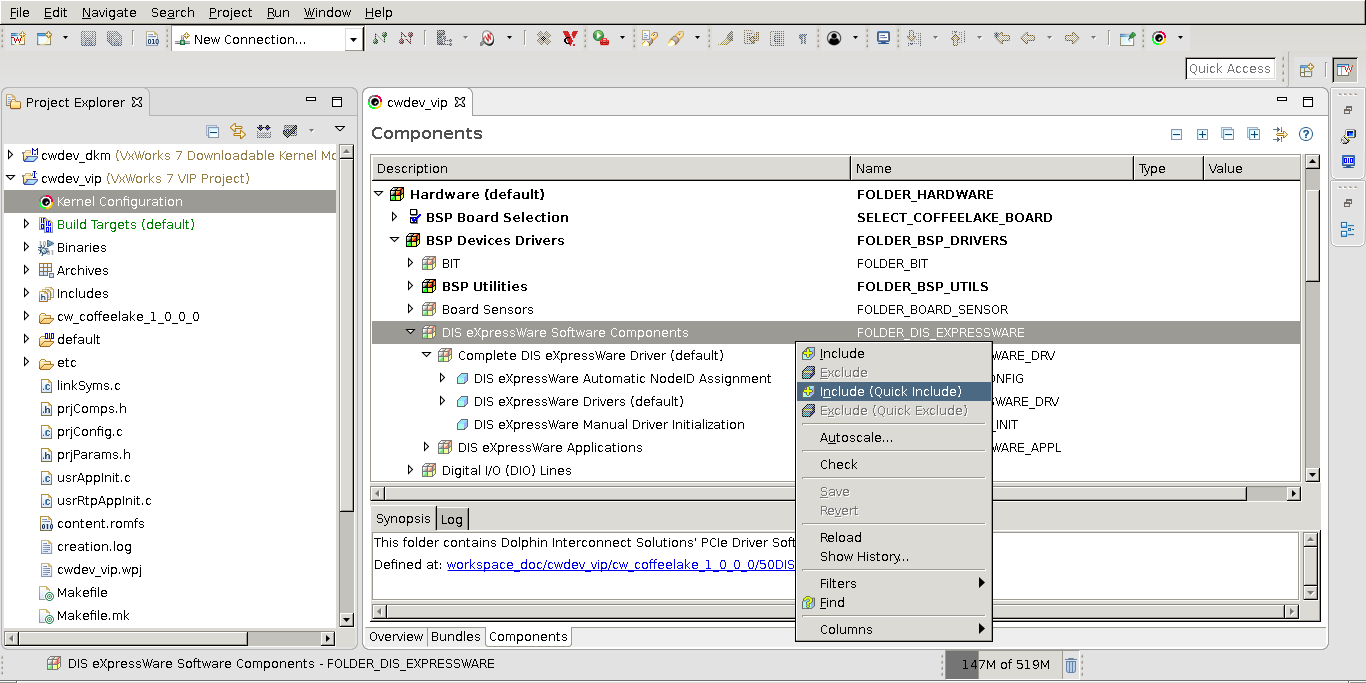
By choosing "Edit Kernel Configuration", a new editor tab is created, see Figure 4.2, “VxWorks Workbench: Include DIS eXpressWare Drivers”. In this tab, locate the folder "DIS eXpressWare Software Components", found in the "BSP Device Drivers" folder.
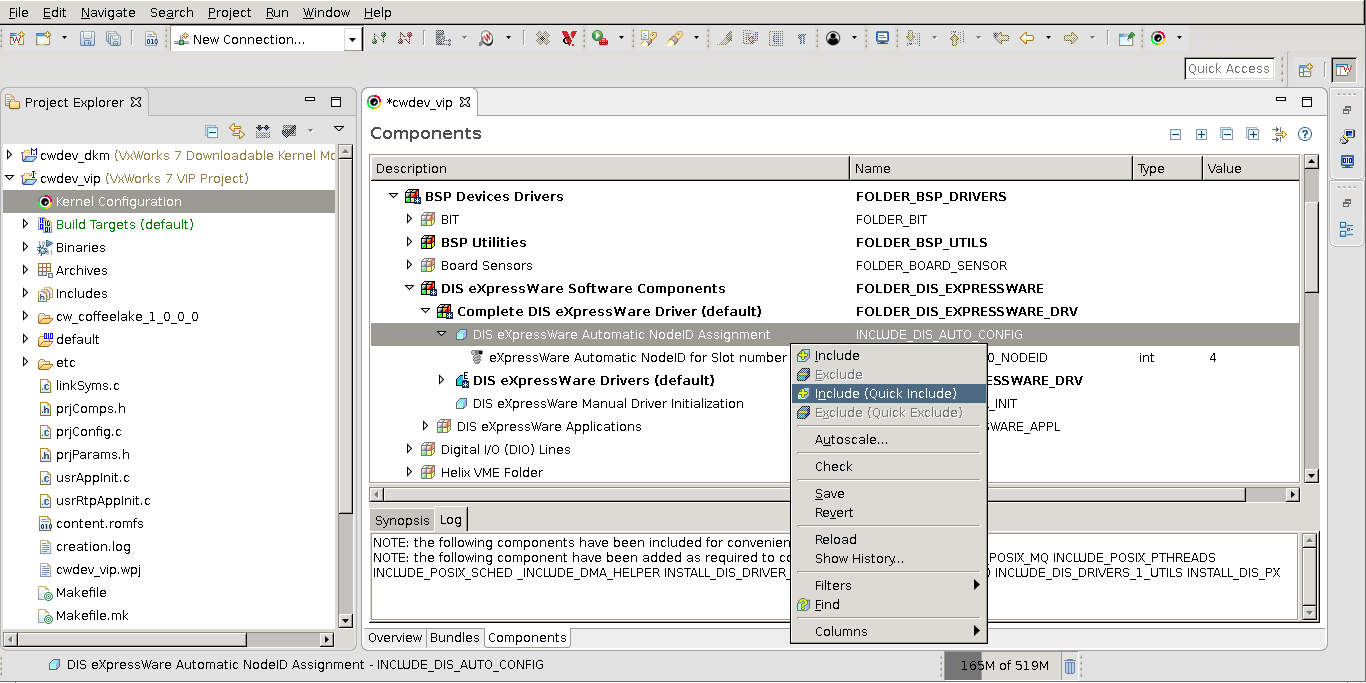
By right-clicking on the folder and choosing "Include (Quick)", the default component ("DIS eXpressWare Drivers") is included. Note that including a component should automatically highlight its name in bold, see Figure 4.3, “VxWorks Workbench: Automatic NodeId configuration”.
The recommended way to configure the PCI Express cluster is by using the automatic NodeId assignment.
The eXpressWare driver and its user applications require an unique NodeId to be assigned to every compute node in a cluster. This NodeId can be automatically configured based on the geographical address of the board, i.e. the chassis slot it is installed in.
To enable this auto-configuration, include the "DIS eXpressWare Node Auto ID" component as shown in Figure 4.3, “VxWorks Workbench: Automatic NodeId configuration”. More information on Cluster configuration can be found in Section 5, “Configuring the Cluster Nodes”
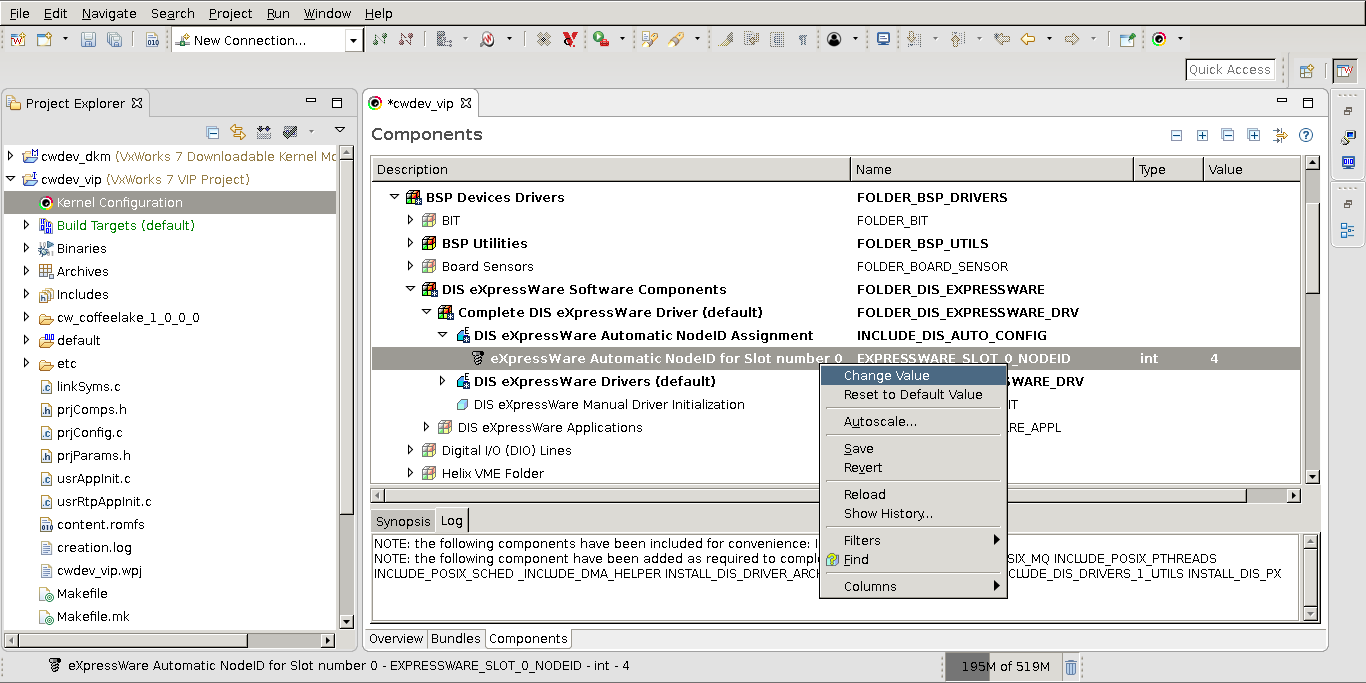
In case the board does not have a valid geographical address (e.g. XMC boards) and the BSP function returns 0 as the slot number, NodeId 4 will be used by default. In order to avoid conflicts with a board in slot 1 the NodeId for slot 0 can be set by the EXPRESSWARE_SLOT_0_NODEID parameter as shown in Figure 4.4, “VxWorks Workbench: NodeId setting for Slot 0”.
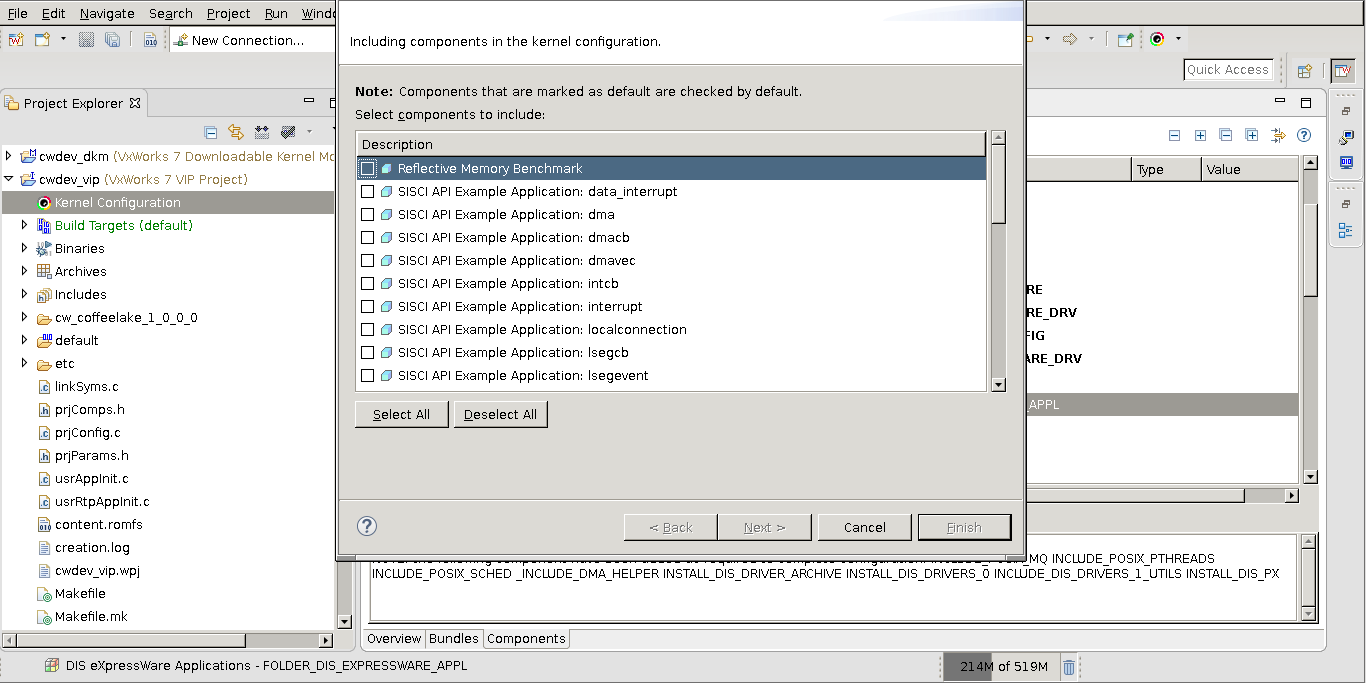
Select the appropriate SISCI demo and benchmark applications to be included.
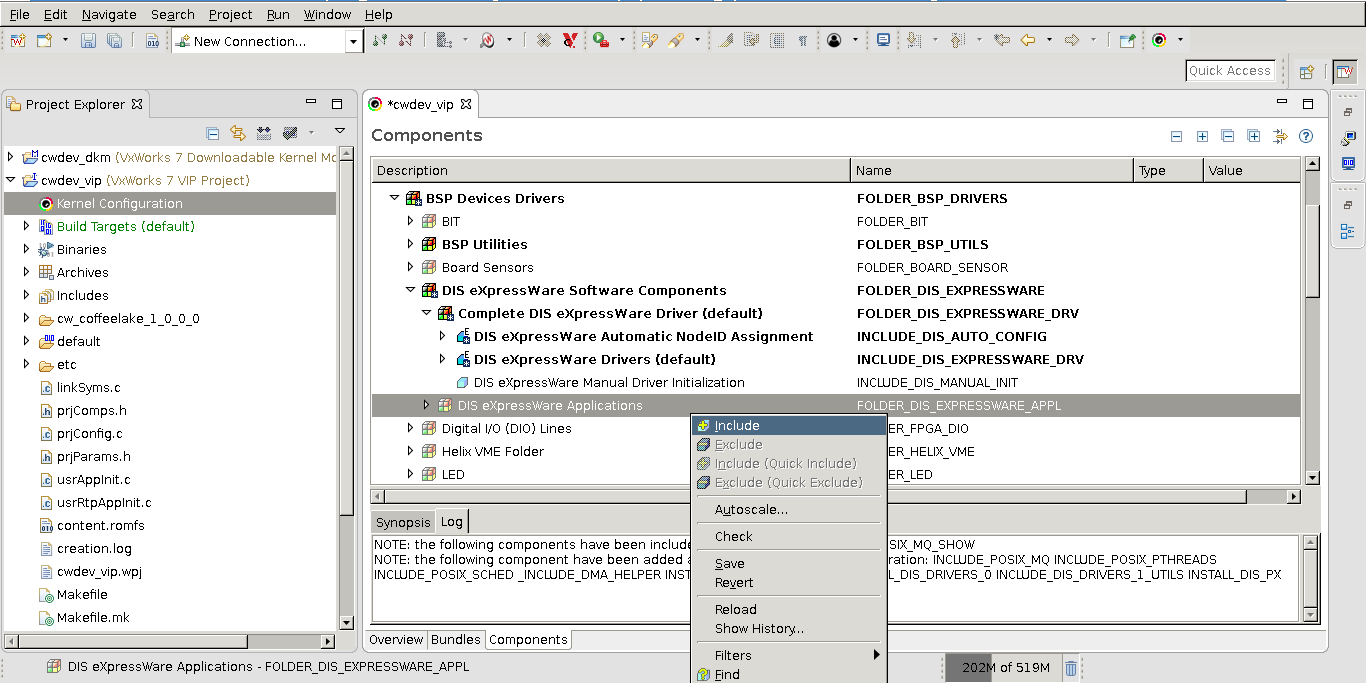
To add examples and benchmarking applications to the kernel image, right click on the "DIS eXpressWare Applications" folder (Figure 4.5, “VxWorks Workbench: eXpressWare applications”). This brings up a pop-up window, see Figure 4.6, “VxWorks Workbench: Select demo applications”, from which you can choose the applications to include. When your happy with your selection, click "Finish".
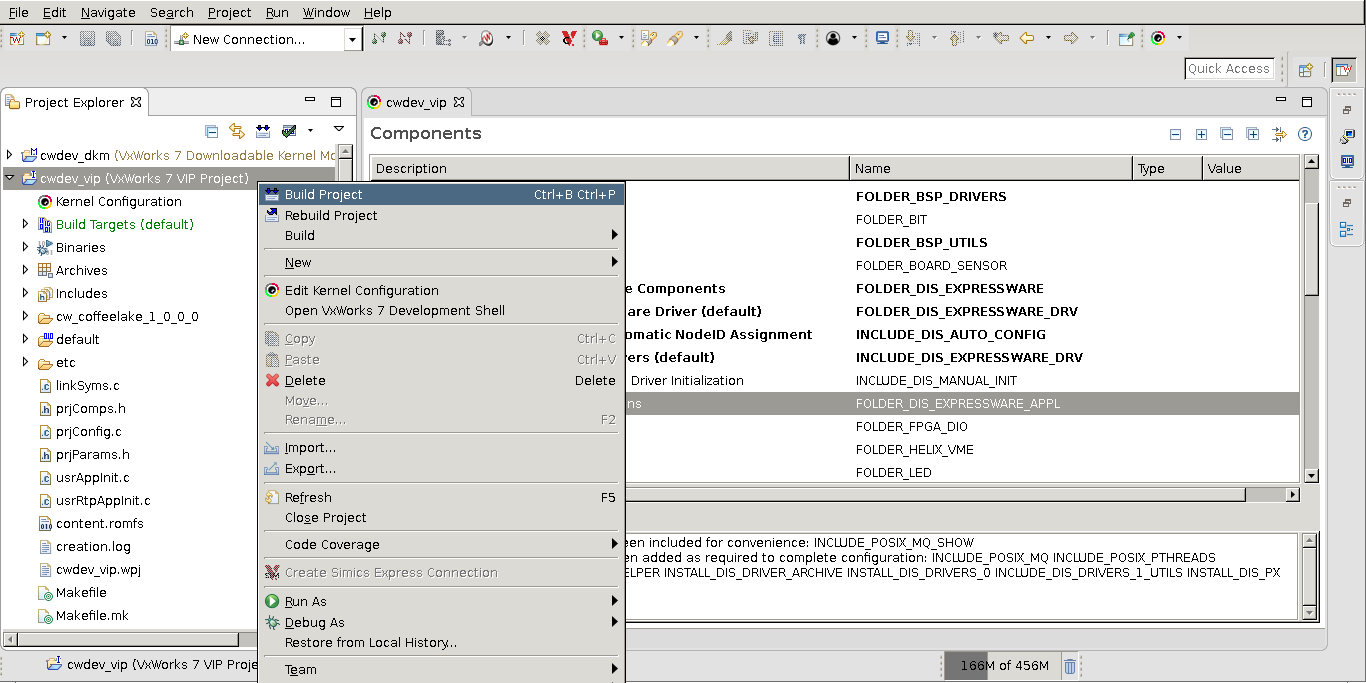
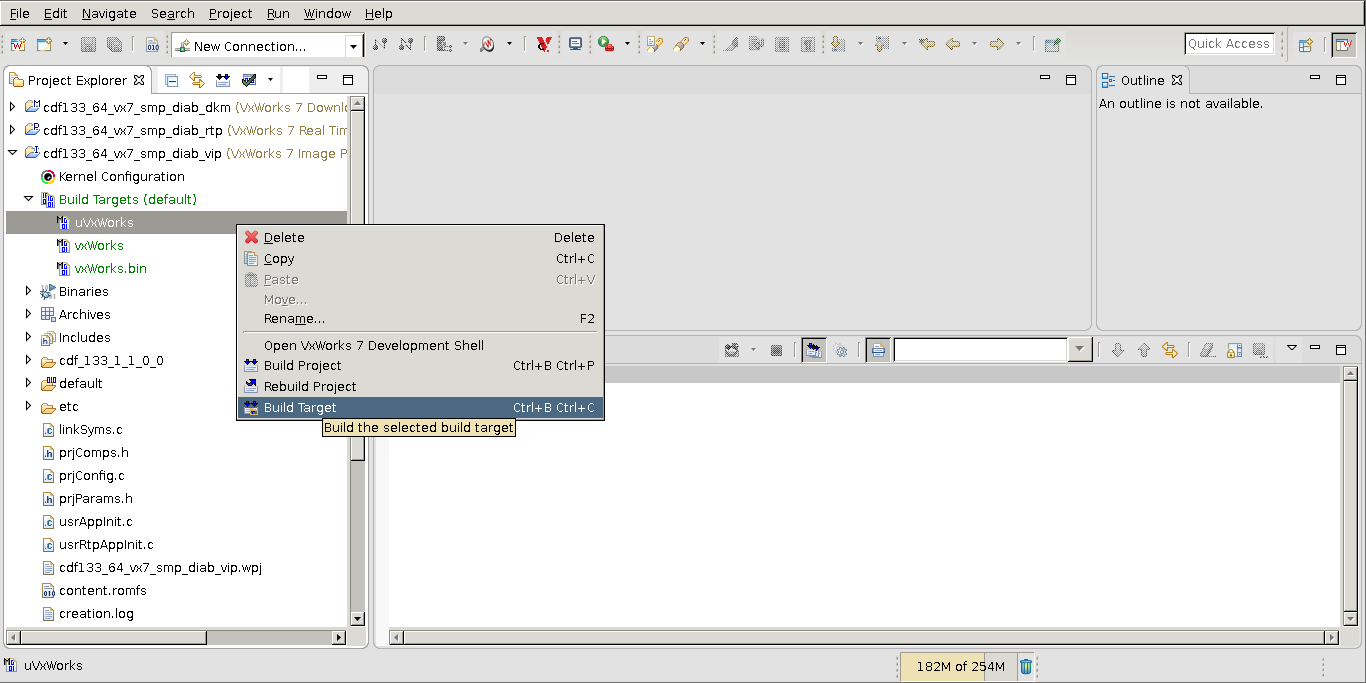
After adding eXpressWare drivers and applications, you need to build the new kernel image. As shown in Figure 4.7, “VxWorks Workbench: Build Project” below, this is done by right-clicking the VIP project and choosing "Build Project" and then building the preferred kernel target. E.g. Figure 4.8, “VxWorks Workbench: Build specific Target” below shows how to build a U-Boot image. Note that the new kernel image must then be made available for the target during boot.