This chapter gives an overview of the steps necessary for a default installation of Dolphin eXpressWare for Windows using the Windows Installer (MSI).
Please consult the detailed installation guide for more details, Chapter 4, Initial Installation .
For a typical interconnect topology consisting of some Cluster Nodes, a network administrator can have the machines fully functional in a matter of minutes: 1) power off the machines 2) plug in the adapters 3) plug in the cables 4) power on the PCI Express switch 5) power on the machines and finally 6) run the MSI package either as a step-by-step guide using the GUI interface or from the command line.
Note
The command line execution of the MSI package still requires the intervention of the computer administrator. Some notifications related to drivers installation have to be confirmed.
Installation requirements: The Windows Installer packages are designed for each Windows release.
For details, see Chapter 3, Requirements and Planning for general platform requirements of the Dolphin PCI Express software stack and Chapter 4, Initial Installation, , Section 1, “Installation Overview” for specific requirements for this installation procedure.
Adapter installation: Install the Dolphin PCI Express cable adapters in the Cluster Nodes.
Note
Please note that the TRANSP DIP switch on the PXH810 and PXH830 board needs to be set to OFF to run the Dolphin Software. Please consult the PXH810, PXH820 or PXH830 Adapter users guide available from http://www.dolphinics.com/support/installation-px.html
For details, see Chapter 4, Initial Installation, Section 2, “Dolphin PX Adapter Card Installation”.
Cable connection: It is recommended to plug the PCI Express cables before powering up the system and installing the software.
Software download: Download the MSI installer from http://www.dolphinics.com/support/index_support_px.html.
Please be careful to select the package corresponding to the Windows version you are using.
Start software installation: launch the MSI package with administrative privileges. On Windows 5.x versions (XP or Server 2003), use the runas /user:<Member of Administrators> syntax:
C:\Windows\System32> runas /user:administrator "msiexec /i C:\Dolphin_eXpressWare_PX_Win61_X86_Ver
_5.5.0.msi"
Enter the password for administrator:
Attempting to start msiexec /i C:\Dolphin_eXpressWare_PX_Win61_X86_Ver_5.5.0.msi as user "BUILDER\
administrator" ...
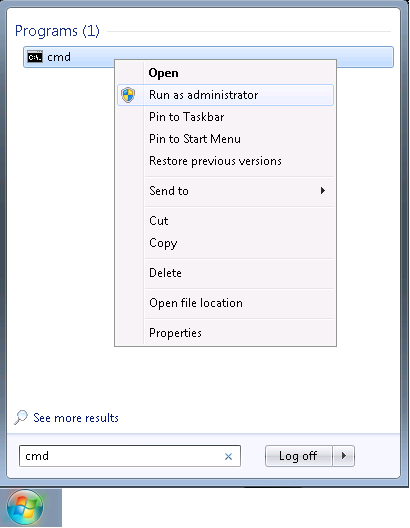
On Windows 6.x versions (Server 2008, Server 2008 R2, Server 2012, Server 2012 R2, Server 2016, Vista, 7, 8, 8.1, 10), use either runas /user:administrator or elevate a command prompt by searching cmd on the Start menu, right clicking on the result and selecting Run as administrator on the menu.
On Windows 7, the drivers may fail to load if the SHA2 validation algorithm is not present in the system. KB3033929 must be installed, as outlined in
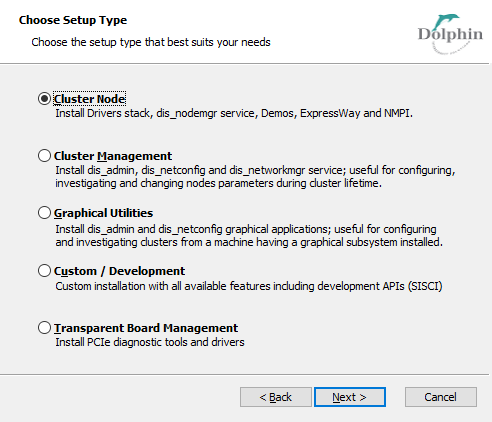
https://docs.microsoft.com/en-us/security-updates/SecurityAdvisories/2015/3033929.The network administrator can launch the MSI package without any arguments and have a guided installation experience. Each feature can be chosen depending of the system requirements: Demos, Development, Drivers, NDIS, Administration, Graphical, Manager, ExpressWay, NMPI, SuperSockets.
An alternative to the wizard is the scripted installation which automates most of the steps related to installation and configuration of the network topology. A sample script is provided in Section 1, “Software Stack Installation” and can be downloaded from
http://ww.dolphinics.no/download/DolphinExpressPxInstall.ps1.The interconnect topology implies the existence of Cluster Nodes and a box running the topology management software. For ease of use, the installer package presents options that cumulate several features. We recommend installing first the Cluster Node software stack, then install the Cluster Management utilities and specify the interconnect topology.
A Cluster Node is prepared by launching the installer package and selecting the Cluster Node option or by selecting the Custom option and selecting the Drivers,Demos,NMPI,ExpressWay and SuperSockets features.
Note
Care must be taken to install the Cluster Management feature on only one machine. The machine can be a Cluster Node or a machine that is outside the nodes belonging to the topology.
The scripted alternative to installing and configuring the interconnect topology is written in PowerShell. Launch .\DolphinExpresPxInstall.ps1 (Appendix D, Example Scripts, Section 1, “Software Stack Installation”) with -Compute, -Management or -ComputeAndManagement switches on each node. The -Management switch can be used on a machine that is not part of the interconnect topology.
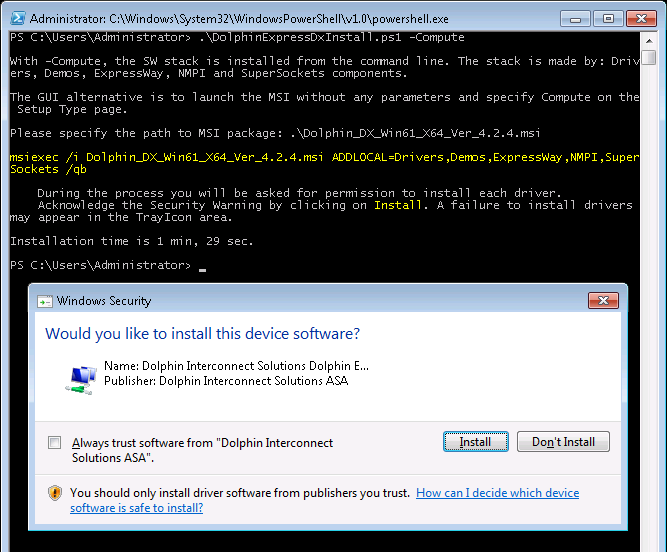
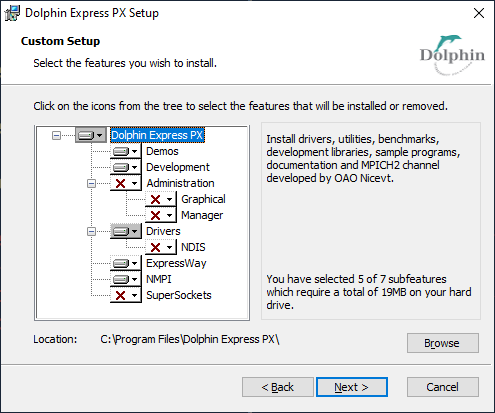
PS C:\Users\Administrator> .\DolphinExpressPxInstall.ps1 -ComputeAndManagement

With -ComputeAndManagement, the SW stack is installed from the command line and the in
terconnect topology is specified and propagated. The stack is made by: Drivers, Demos,
ExpressWay, NMPI, Administration, Graphical and Manager components.

After the installation, the configuration stage asks for the topology characteristics
and calls dis_mkconf.exe. The tool is called while the dis_networkmgr service is stopped.
The new topology characteristics are propagated to each interconnected
Cluster Node after starting dis_networkmgr service.

The GUI alternative is to launch the MSI without any parameters and specify Custom on
the Setup Type page, then select each of the aforementioned components.

Please specify the path to MSI package: .\Dolphin_PX_Win61_X64_Ver_5.5.0.msi

msiexec /i Dolphin_PX_Win61_X64_Ver_5.5.0.msi ADDLOCAL=Drivers,Demos,ExpressWay,NMPI,S
uperSockets,Administration,Graphical,Manager /qb

    During the process you will be asked for permission to install each driver.
    Acknowledge the Security Warning by clicking on Install. A failure to install driv
ersmay appear in the TrayIcon area.

Please specify the Cluster Nodes that belong to the interconnect topology.
Separate the names with spaces: chall-5 chall-6
Please specify the topology type: [D]irect, [S]witch: s
Please specify the link width [4][8]: 8

Stop-Service dis_networkmgr
& 'C:\Program Files\Dolphin Express PX\Util\dis_mkconf.exe' -fabrics 1
-sctt 9 -sclw 8 -nodes chall-5 chall-6
Start-Service dis_networkmgr

Launching dis_admin. Press Ctrl+O to connect to localhost and view the interconnect stat
us. Launch applications from Cluster/Run Application menu.

Installation time is 1 min, 46 sec.
For details on this part of the installation, please see Chapter 4, Initial Installation,Section 3, “Software Installation”.
Interconnect configuration: The MSI package will install the configuration utilities when the user selects Graphical or Management on the Setup Type page or selects the Graphical feature from the Custom Setup Type. After the software has been installed, the Dolphin Network Configurator is launched. This tool is used to write the configuration files for the interconnect.
For details on how to perform this task, see Chapter 4, Initial Installation,Section 3.4, “Working with the Dolphin Network Configurator, dis_netconfig”.
Verify the installation: After the installation completes, start dis_admin and use the cabling test and the fabric test to verify the interconnect installation.
Warning
Please carefully perform the installation test. If you enable your application to use PCI Express without completing this step, you may be required to stop or restart your application to overcome possible installation issues at a later stage. All tests should pass before using the PCI Express cluster for production purposes. At this point, you can safely execute your tests without affecting the system.
For details on how to run these tests and handle the results, see Chapter 4, Initial Installation, Section 3.7, “Interconnect Validation using the management GUI”, Section 3.8, “Interconnect Validation using the command line”.
Reboot the system: It is recommended to reboot the system to verify the automatic restart of the drivers and to ensure optimal memory allocation for the PCI Express drivers.
Run you application: Enable your applications to make use of SuperSockets by using the dis_ssocks_run.exe wrapper. The file is located in
%ProgramFiles%\Dolphin Express PX\SuperSockets\Bindirectory and takes as input switches the application path followed by the application switches. The first parameter can be -pause which waits for user input after the application has finished.The eXpressWare installation comes with several example, demo and benchmark programs that can be executed to determine the actual PCI Express PIO, DMA and Interrupt performance.
For details on this step, please see Chapter 10, SuperSockets, Section 2, “Make Generic Windows Applications use SuperSockets”.
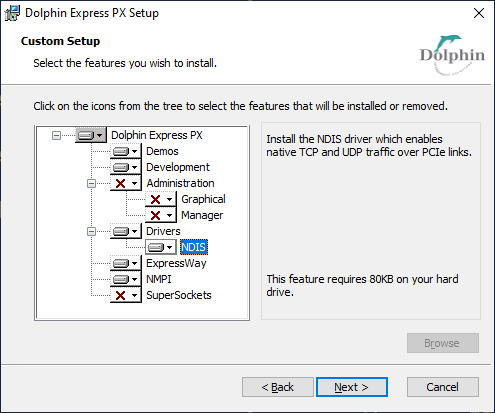
Optionally, install the NDIS driver. For certain configurations, the NDIS driver is installed with the Drivers feature. For general use, the NDIS driver comes as an optional component which can be enabled or disabled. By default, the Drivers stack will be installed without the NDIS driver.
The NDIS driver enables TCP and UDP traffic through the operating system stack. Protocols that are implemented in kernel mode, such as network file systems or data replication, stand to benefit from higher throughput and lower latency.
To install the NDIS driver, launch the MSI package and select it under the Drivers feature.
Note
The NDIS driver does require an initial configuration stage which is initiated through the Ethernet back-channel. The configuration is computed and transferred through dis_networkmgr and dis_nodemgr agents. If needed, please contact Dolphin for instructions on how to bypass the Ethernet configuration.